Here we explain the basics of paper box dielines and how to create one in Illustrator from a pre-existing package. For this tutorial, I used a small gum pack. A dieline template is a flattened outline of the cut and fold lines for a package; it serves as a template. Designers often receive dielines from their printer; however, if your client wants a new style of package or a package structure for which the printer does not have a template, you might need to create one from scratch. If the client gives you a package to use, it’s pretty easy to scan it in and create dielines over it in a program such as Illustrator.
Setting up your file
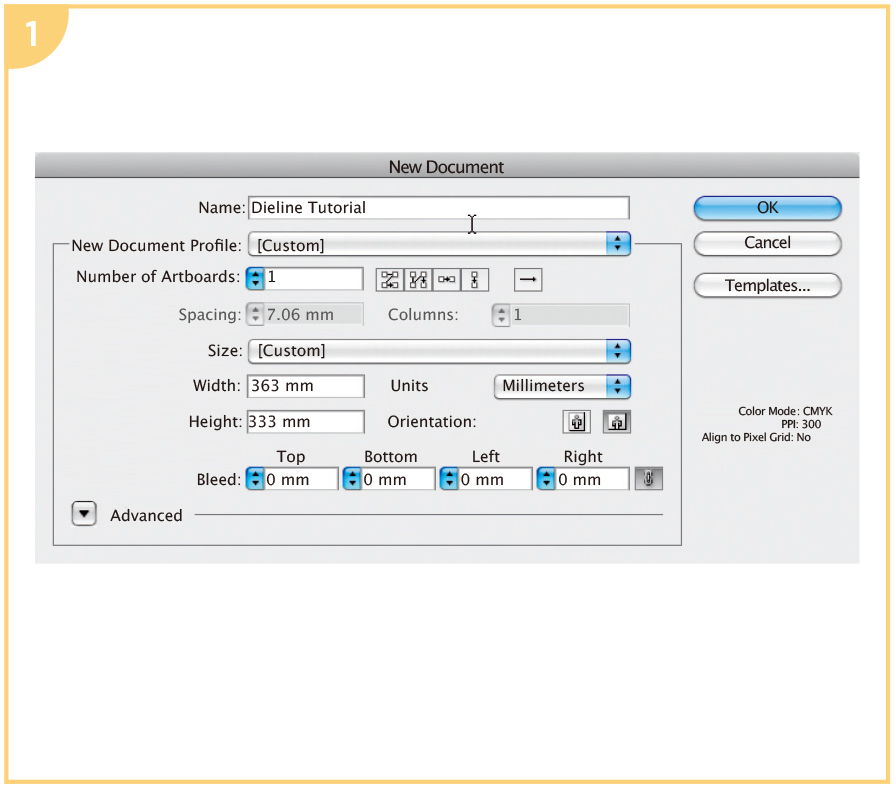
Create a new file in Illustrator big enough to hold your dieline, PMS swatches, and design notes.
Creating layers
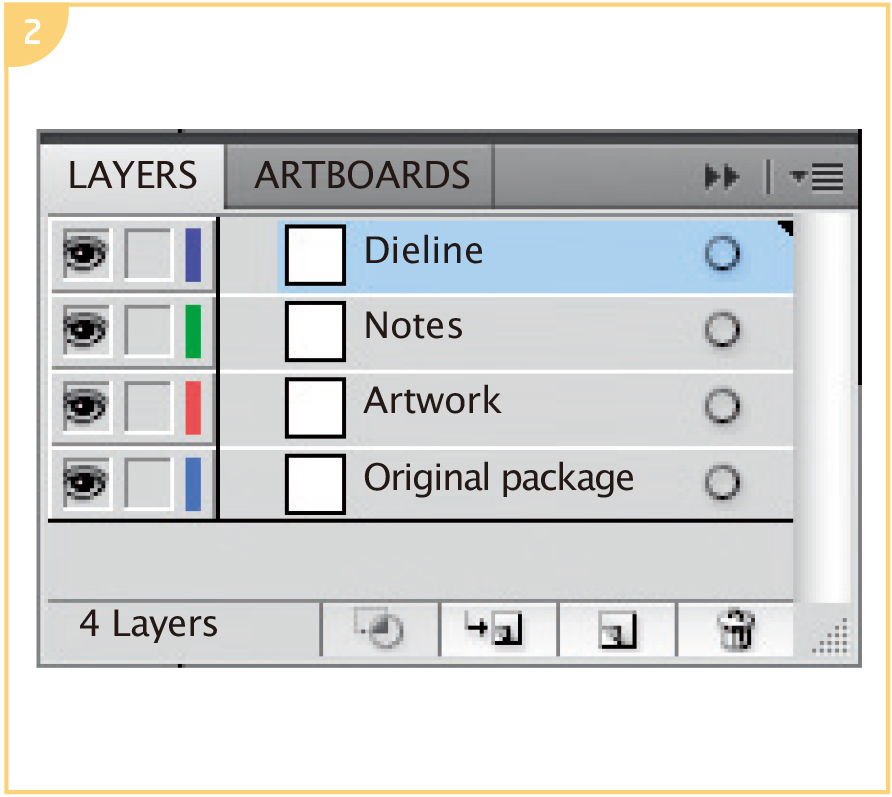
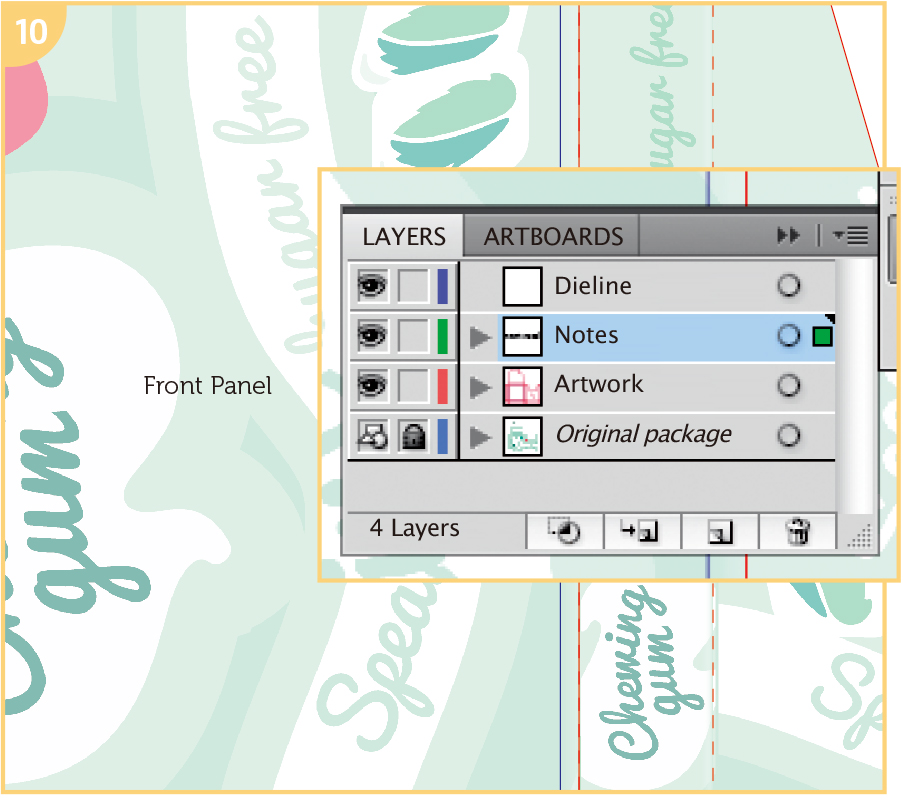
Create four layers: one titled “Dieline”, one “Artwork,” one “Original package” and one “Notes.” Your Dieline layer should be on top.
Make a template layer
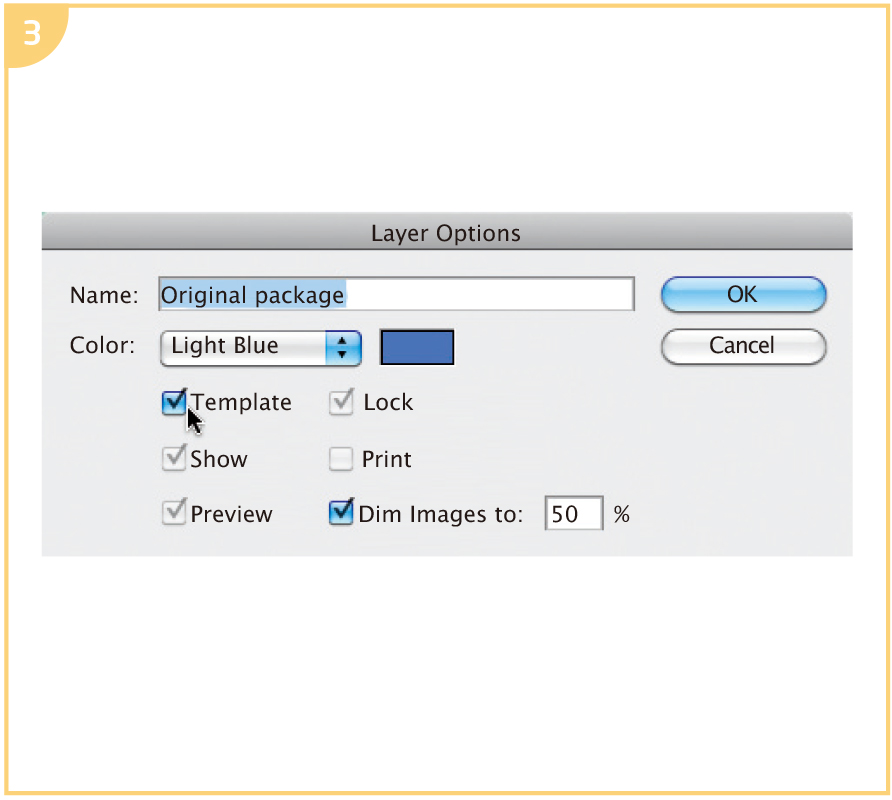
When you create the Original package layer, check the Template option. This will allow you to always see the original packaging, but as a light tint so that you can clearly see your dieline and new artwork in the foreground.
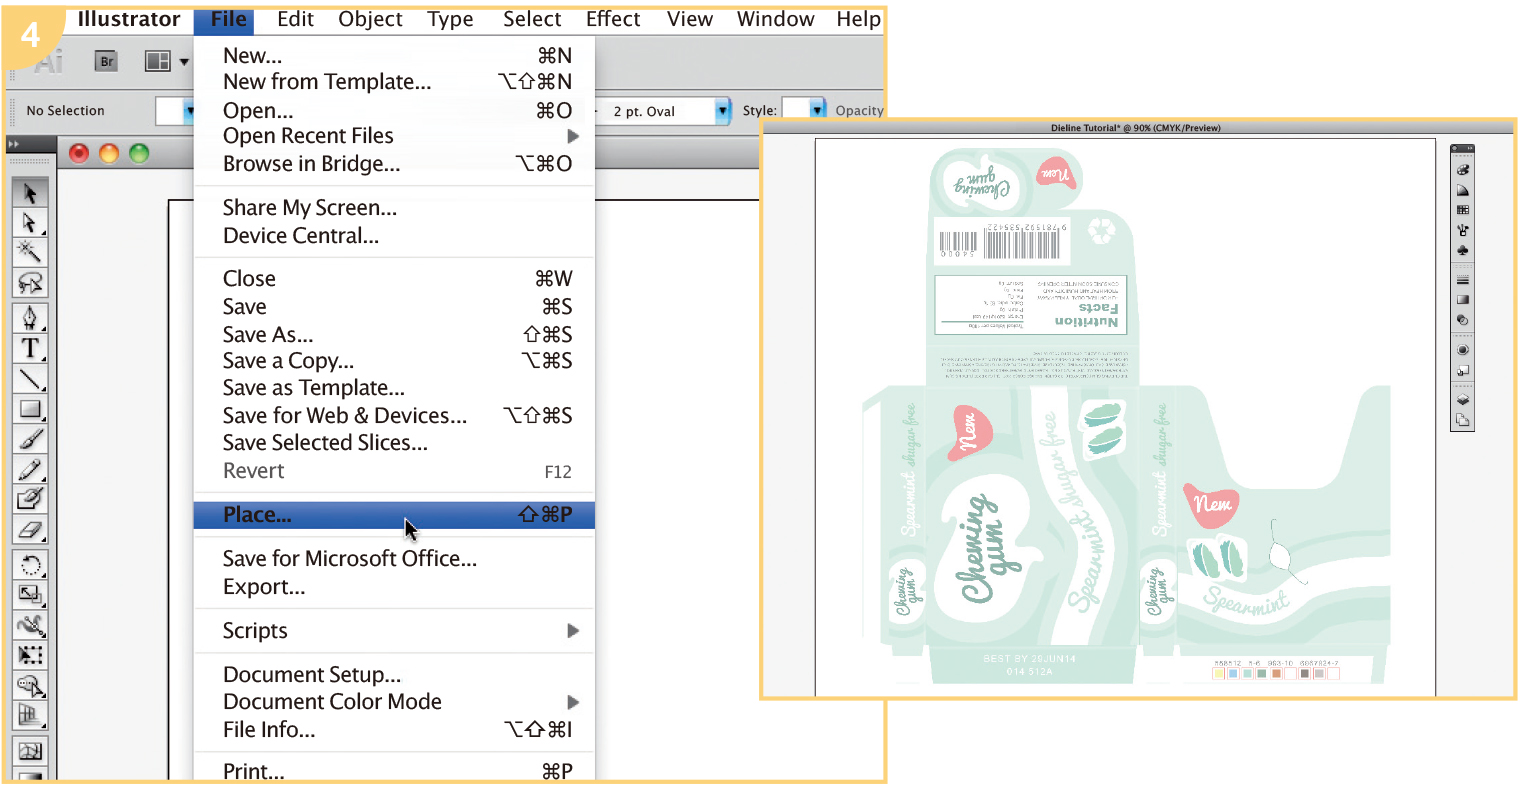
Placing your artwork
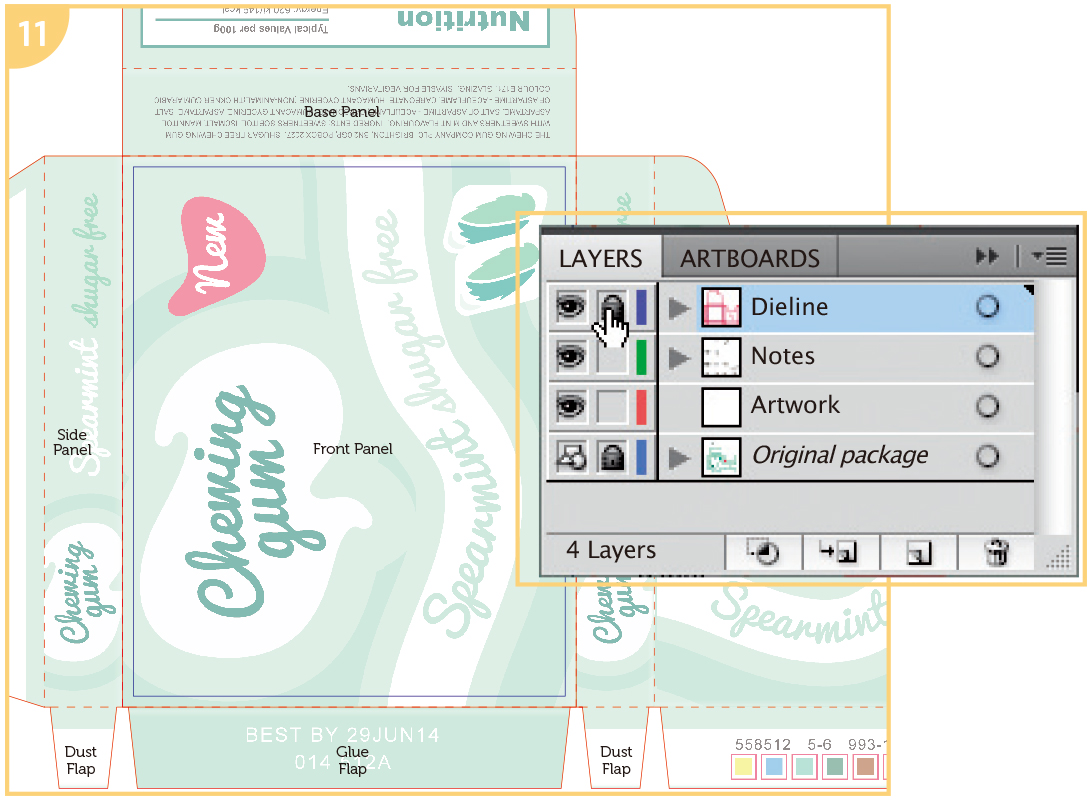
For this small template, I used an 11 × 81⁄2in (28 × 21.6cm) artboard. Gently open out your package and scan it. Place this scan on the Original package layer and then lock that layer by clicking on the padlock icon.
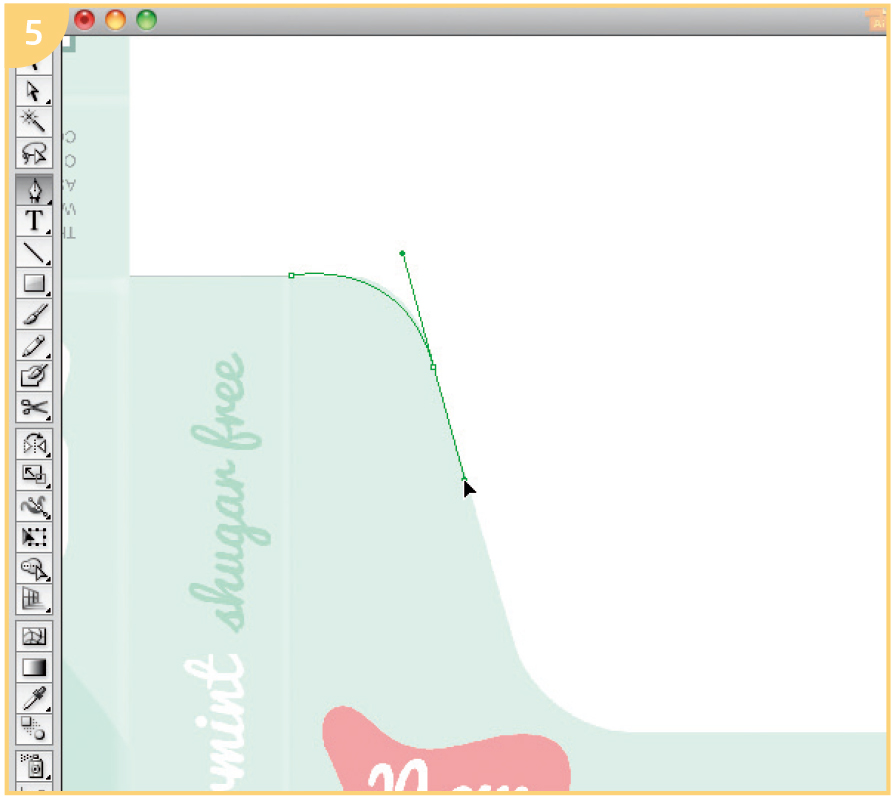
Drawing lines
Use either Shapes or the Pen tool, whichever you are most comfortable with, to draw your guidelines. Either is fine, as long as you are making clean, accurate lines.
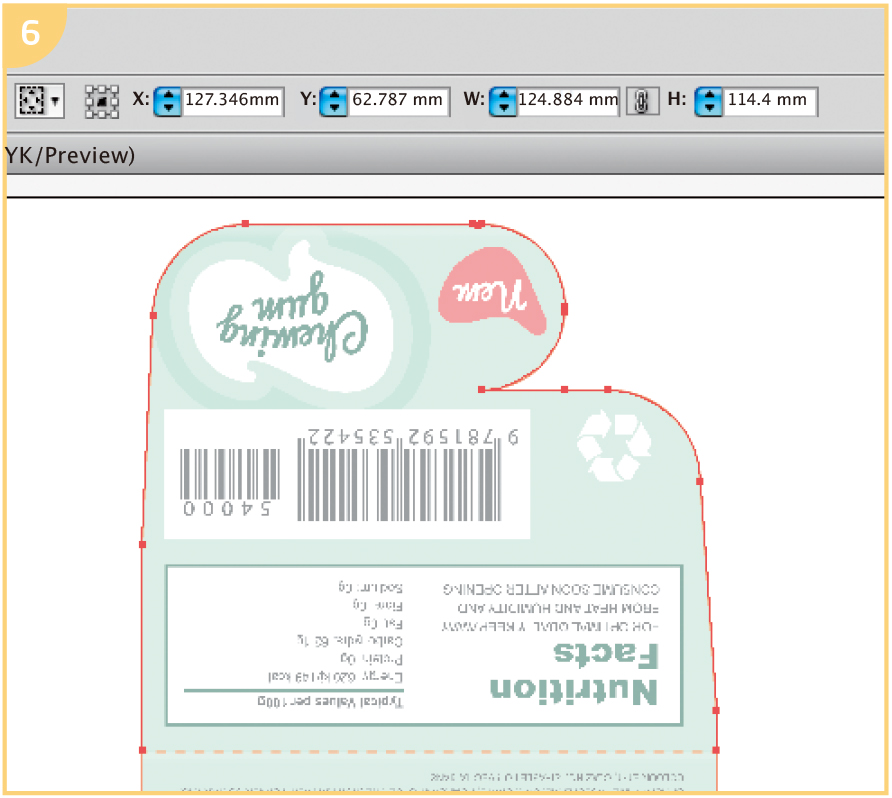
Check measurements
When you work from a pre-existing template, you’ll need to check your accuracy by taking measurements from your template and comparing them to the in-progress dieline.
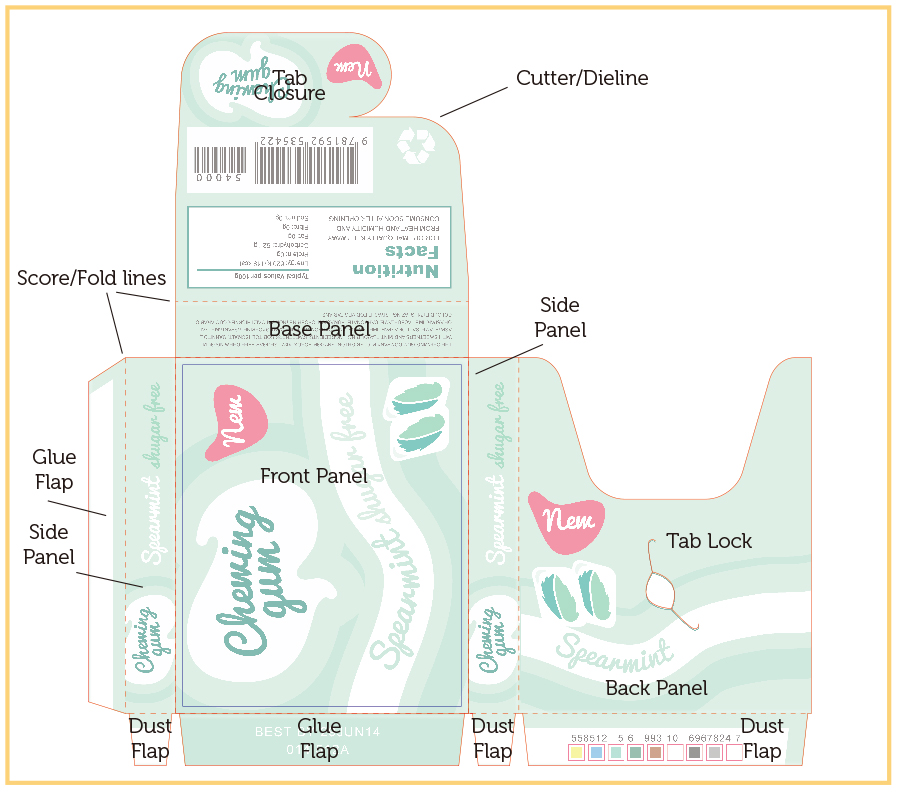
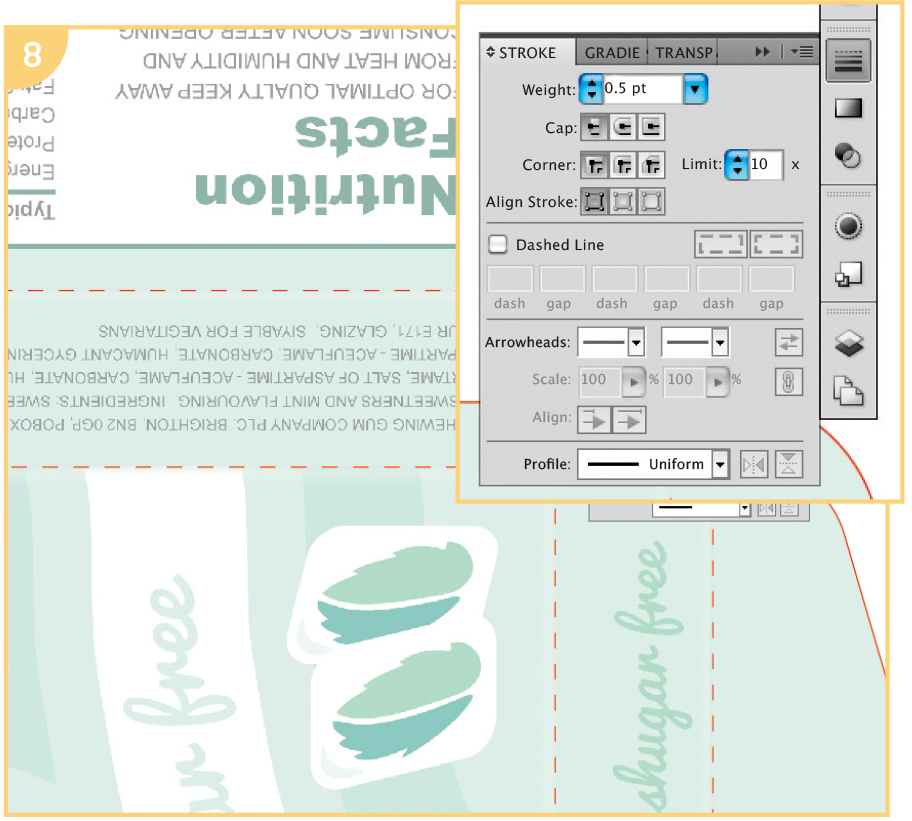
Cut lines
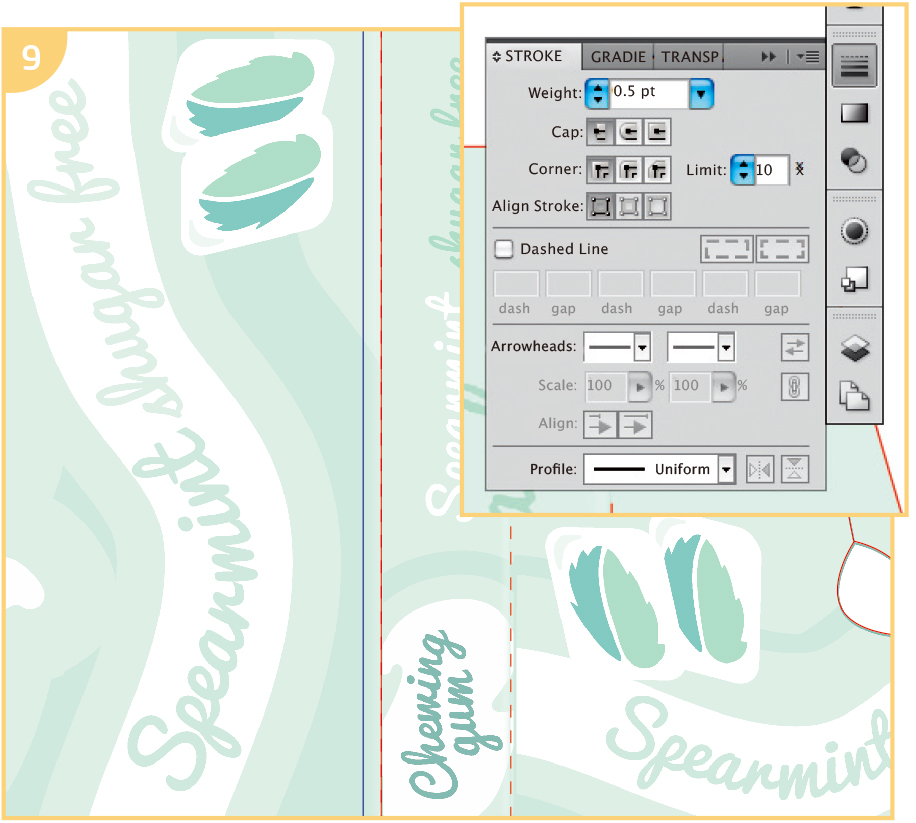
Cut lines are indicated with solid red lines, typically .25 or .50pt.

Fold lines
Folds are indicated with solid or dotted red lines. (I use dotted lines in this tutorial.)
Safe margin lines
Safe margins are shown either with guides or blue lines.
Labels
Identifying labels, such as “Front Panel,” “Glue Panel,” “Tuck Flap,” etc., should be put on your Notes layer.
Lock Original package layer
Once you have created your dielines, lock that layer by clicking the padlock icon.
Creating a prototype
Once you have a basic dieline, you can place your art on the Artwork layer. Create a hardcopy prototype of your package by printing out and assembling your design.

This will show you any errors in orientation, measurement, text or art placement and give you the opportunity to fix them. Once your dieline is ready, send it to the printer and ask for a proof. If you receive this in digital rather than printed form, print and assemble it in order to check one last time for orientation, spelling, placement errors, and so on. If you can’t print out your dieline to full size, assembling a miniature version will work as, by this point, your measurements should be perfect.
Shanghai DE Printed Box is a leading China paper box manufacturer and packaging solution provider with facilities around 100,000 square meters in total. The company exclusively specializes in the supply and export of the custom paper boxes, including the paper printed box, corrugated printed box, cosmetic paper box, rigid paper box, cardboard gift box and custom paper bag. Email us to get a free paper box dieline template or get a price quote.